20 Important Tips to Maintain Nuts and Bolts of 2 Stroke Marine Engine
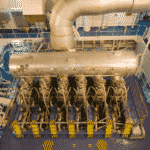
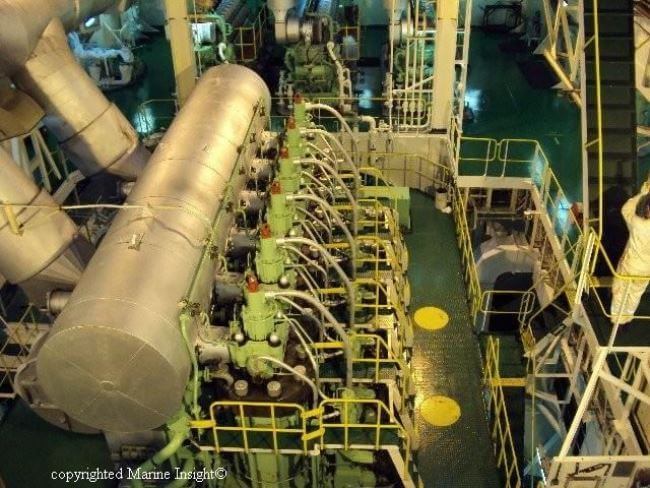
A ship’s 2-stroke engine, sometimes as big as a 4-5 story building, provides enough power to propel the ship loaded with tons of cargo. For e.g. imagine the power that would be needed to push the world’s biggest container ship carrying fully loaded 20,000 twenty-footer containers. Needless to say, it requires a beasty engine to do the job, and hence a massive main engine is required in ship’s engine room.
A marine engine is one single unit on a ship. However, during installation when the ship is under construction, it’s impossible to build it as one unit.
Engine parts are manufactured separately, and then they are assembled as one unit for the final product. Essential engine parts such as bedplate, A-frame, entablature, combustion chamber parts, auxiliaries etc. are joined together using two main methods:
- Welding
- By Bolt/stud/screw
A marine engineer on a ship usually does not carry out any maintenance on the welding of the main engine, and if there is any problem in the weld, the manufacturer is responsible for doing the rectification.
Related Read:
Common Welding Methods And Weld Defects In Shipping Industry
However, there are hundreds of stud/ bolts present in the engine which requires frequent opening and closing for maintenance and troubleshooting purpose.
Following are essential tips a marine engineer should consider when handling studs/ bolts/ screw of a two-stroke marine engine on ships:
Common practice for all
1. Do not forcefully take out the bolt/ stud if it is harder to turn it out. Always use sprays (WD-40) or lube oil to ease its way out to avoid breaking of the stud
2. Before inserting the bolt/stud in the threaded slot, always clean the hole without fail. Use pressurised air (service air) to clean tiny debris inside the hole
3. Always lubricate the threads of screw/ bolt with oil before inserting them into the hole
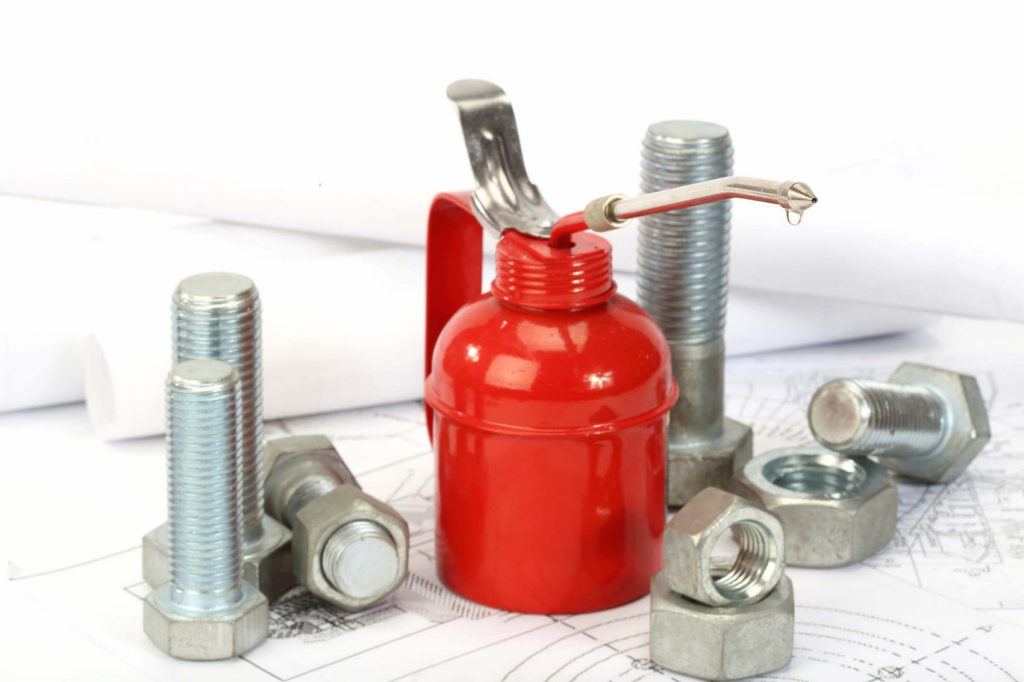
4. Always use anti-seizure compound on the threads of screw/ bolt when using them in a high-temperature area such as exhaust manifold etc.
Related Read:
Exhaust Gas System Of Main Engine On Ship
5. When inserting the bolt/ stud in the hole, tighten it by hand (or spanner/ recommended tool) until the bottom of the screw touches the slot surface. Post that, use the rated torque for tightening
6. Always use correct size spanner for tightening the nut/bolts to prevent personal injuries or damage to the nut/bolt. Avoid using adjustable spanner or wrench to do this job.

7. If the bolt/ stud feels stuck or tight before reaching the bottom, avoid forcing it down the slot to prevent thread damage. Remove the stud/ bolt and tap the hole with correct size tapping tool.
Related Read:
A List of Processes Used In Marine Workshop On Ship
General Bolts and the Screws
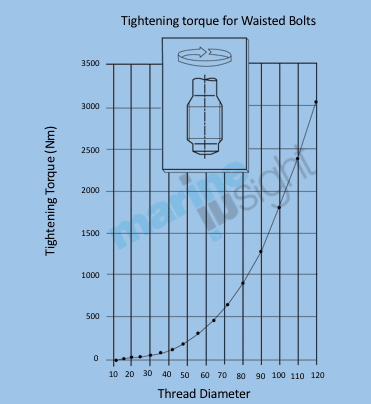
8. These are the most common type used for tightening and securing different parts of the engine. All such bolts and screws have specific tightening torque which will depend on the thread size, its pitch and the material it is made of. It is important to refer makers manual before tightening these screw/ bolt.
E.g. M 8 tightening torque may vary from 20 -30 NM, and for M 10 it may be in the range of 40 – 50 NM depending on the factors mentioned above.
Studs
9. A standard stud will have threads on both the ends of a plane rod. These are used to fasten injectors and other small parts of the engine. Never use a pipe wrench or a plier to remove this stud. Fasten two nuts on the top threads and tighten them against each other. Once the nuts are holding each other and with the stud, rotate the upper nut to open the stud.
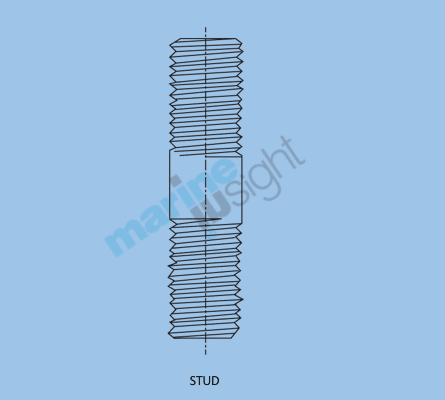
10. A waisted stud is similar to a standard stud with threads on both ends. The main difference is its central or waist portion has a diameter equivalent to the core of the threaded portion, making it lighter without losing the strength. They are popularly used to hold cylinder jacket and cylinder cover. When fitting the waisted stud, always fill the annular space above the thread with a non-hardening sealing compound
Foundation bolt
11. The foundation bolts of a two-stroke marine engine are hydraulically tightened. In some arrangements, the foundation bolt near the thrust block may have sleeve which needs to be checked for cracks or fretting during inspection
Related Read:
Important things to check in ship’s engine bed plate
12. If anyone of the foundation bolts is found loose, it is important to re-tight all the foundation bolts with the rated pressure
13. The foundation bolts are typically tightened in two steps, first at a lower pressure (all bolts are tightened at say 500 bar) and than at the rated pressure (all bolts are tightened at say 1000 bar) as prescribed in the makers manual
Main Bearing Jack Bolt
14. Some engine makers use Jack bolts to hold the main bearing assembly of the engine. It is important to secure the bolts before loosening them to avoid falling outwards.
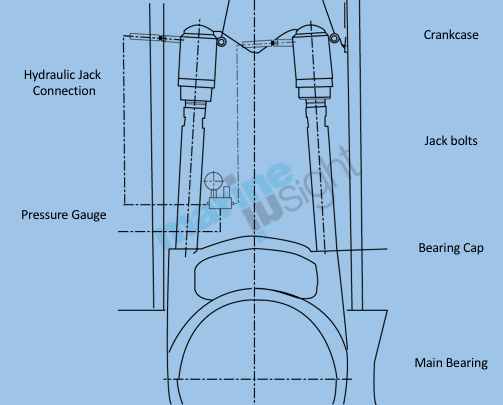
15. The tensioning or loosening of the jack bolts should never be done if any of the tie rods are loose or not tightened to its rated pressure
Related Read:
4 ways to measure the main bearing clearance of two-stroke engine
Tie Rod
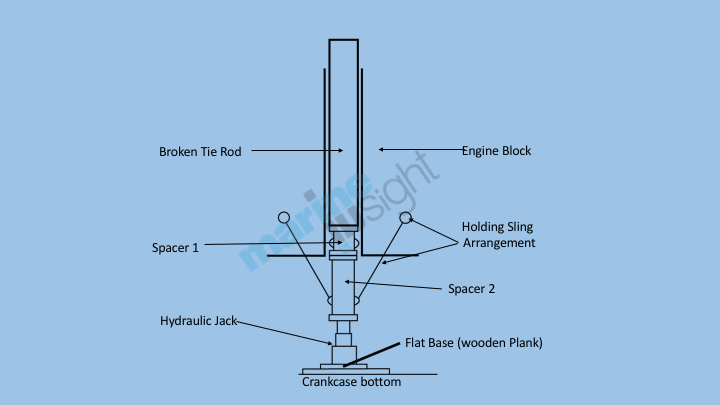
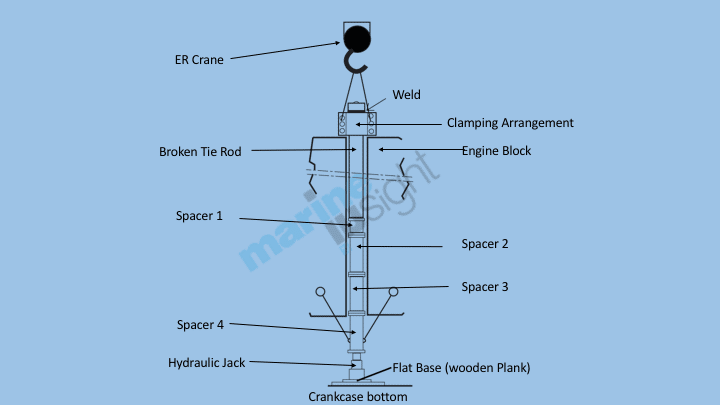
16. A tie rod holds the major parts of the engine together, i.e. the bedplate, the A-frame and the entablature. The biggest challenge seafarer face with tie rods is to remove it when it is broken. The most common method is to use a hydraulic jack and spacer to remove the tie rod from the top
17. It is easy to remove the broken upper half, which can be lifted using engine crance. The lower half cannot be accessed inside the sleeve. To remove the lower half, use a clamp and secure it to the engine frame as shown
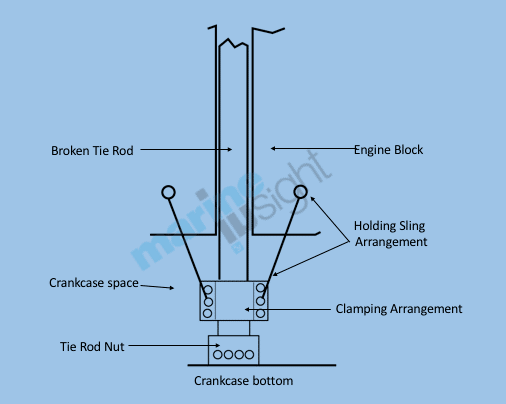
18. Arrange spacers with hooks on both sides with size smaller than the tie rod so that it can be inserted in the tie rod sleeve
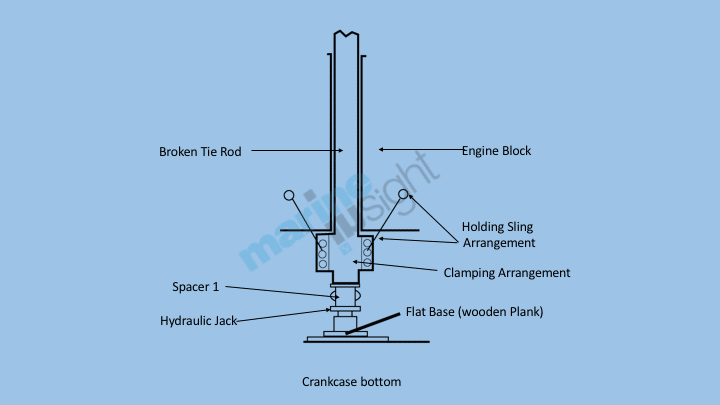
19. Lift the tie rod using the clamp and insert a hydraulic jack below it with a spacer. Secure the hook to the spacer and lower the jack pressure. Insert another spacer and pressurise the jack and repeat the process till the tie rod comes out from the top.
20. Use a clamp and tag weld it with a tie rod to avoid slipping. Using engine room crane, lift the broken half.
It is important for a ship engineer to know the nuts and bolts of his/her engine and maintain the nuts and bolts from which the engine is held tight.
Disclaimer :
The information contained in this website is for general information purposes only. While we endeavour to keep the information up to date and correct, we make no representations or warranties of any kind, express or implied, about the completeness, accuracy, reliability, suitability or availability with respect to the website or the information, products, services, or related graphics contained on the website for any purpose. Any reliance you place on such information is therefore strictly at your own risk.
In no event will we be liable for any loss or damage including without limitation, indirect or consequential loss or damage, or any loss or damage whatsoever arising from loss of data or profits arising out of, or in connection with, the use of this website.
Do you have info to share with us ? Suggest a correction
Disclaimer :
The information contained in this website is for general information purposes only. While we endeavour to keep the information up to date and correct, we make no representations or warranties of any kind, express or implied, about the completeness, accuracy, reliability, suitability or availability with respect to the website or the information, products, services, or related graphics contained on the website for any purpose. Any reliance you place on such information is therefore strictly at your own risk.
In no event will we be liable for any loss or damage including without limitation, indirect or consequential loss or damage, or any loss or damage whatsoever arising from loss of data or profits arising out of, or in connection with, the use of this website.

About Author
An ardent sailor and a techie, Anish Wankhede has voyaged on a number of ships as a marine engineer officer. He loves multitasking, networking, and troubleshooting. He is the one behind the unique creativity and aesthetics at Marine Insight.
Latest Marine Technology Articles You Would Like:
- 10 Harmful Effects Of Impure Air On Ship’s Machinery
- 10 Important Things to Check While Starting Fuel Oil Purifier on Ships
- 10 Noteworthy LNG-Powered Vessels
- 10 Points for Efficient Turbocharger Operation On Ships
- 10 Practical Tips to Handle Engine Room Pumps
- 10 Precautions to Take Before Operating Controllable Pitch Propeller (CPP) on Ships
Subscribe To Our Newsletters
By subscribing, you agree to our Privacy Policy and may receive occasional deal communications; you can unsubscribe anytime.


