How Sighting, Boring and Alignment of Ship’s Propeller Shaft Is Done?
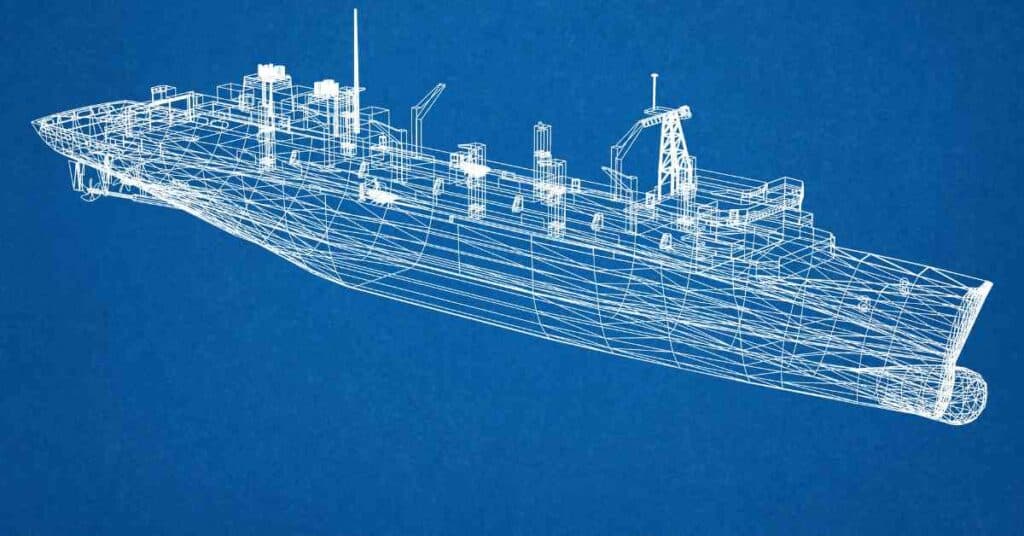
It is seemingly easy to visualise a ship from the design drawings. And it is equally tough to turn the drawings into steel in a shipyard. That too, with the same precision as it was designed and drawn on paper, which brings us to one of the most relatable examples of this aspect.
The main engine of a ship is coupled to the propeller by means of a shaft. The translational motion of the pistons induces a rotatory motion on the crankshaft, which is in turn, coupled to the propulsion shaft. The shaft then passes through the stern tube. At the aft end of the shaft, and outside the stern tube, is coupled, the propeller. The arrangement is shown in Figure 1.
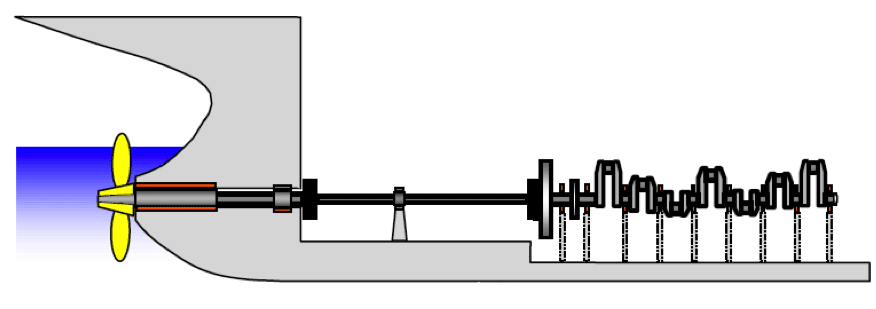
The centreline of the crankshaft must be along the centreline of the propulsion shaft, and the propeller. If that fails, the propeller will wobble about its position during running condition. Even few millimetres of wobbling can result in development of high stresses in the shafting arrangement, leading to structural failure. Not only that, the rupture of propulsion shaft can also lead to a major accident on ship.
As you can see above, it is very easy to visualize such an arrangement on paper or in a computerized drawing. But consider this. Suppose, during construction of the ship, the shaft was not positioned exactly along the crankshaft centreline. Given the fact that the shafts are long enough, up to more than 7 to 10 meters in average ships, the offset of the shaft centreline at the aft end would end up in order of centimetres. And that is not a design failure, but a failure in the production method.
So how do ship builders ensure the alignment of shafts exactly as per the design? In order to ensure that, builders follow a method called Boring and Sighting of the stern tube, which is described in the points below:
1. Sighting and Boring of a ship’s stern tube is done to establish practically the centreline of shafting, as accurately as per the design.
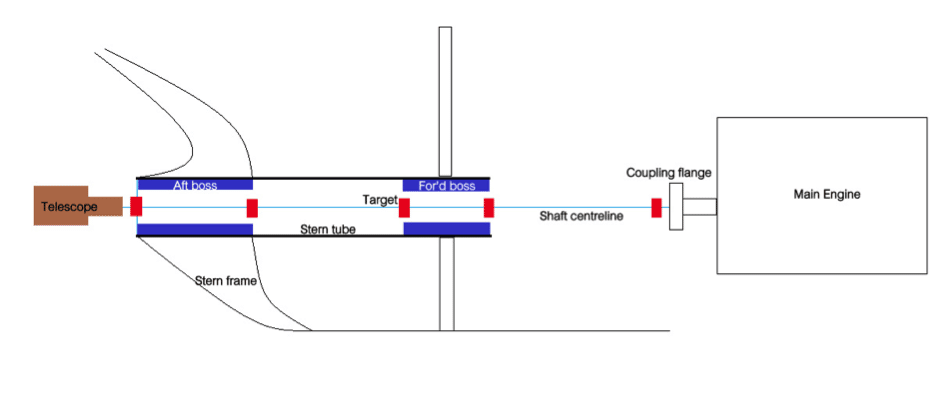
2. The stern tube consists of two bearings. One bearing at its forward end (called the forward bush bearing) and the other at its aft end (called the aft bush bearing). It is through the aperture of these bearings that the propulsion shaft passes. The clearings between the bearings and the shaft are very minute, and hence the shaft centre line is to be correctly established in line with the centres of the bearings. By maintaining this, it is ensured that the shaft centreline matches the centreline of the bearings, and the crankshaft. Again, the bearings are fitted within bosses (discussed in detail later). Follow Figure 2 to understand the arrangement of bosses in a stern tube.
3. The stern frame of the ship is the aft most structure of the hull and it is forged separately, and then attached to the remaining hull structure. The stern frame also houses the stern tube. The stern tube, in turn, houses the aft bearing. So the shipyard orders the manufacturer of the aft bush bearing with a machining allowance on the internal diameter. Why? Well, machining allowance means, if the required internal diameter of the bearing was 0.5 meter, the manufacture will order for an internal diameter with 0.49 meter. When the ship builder passes the shaft through the bearing, it is then, that he will machine the internal diameter to 0.5 meter, so as to match the design value.
4. Now, how do these bearings fit within the stern tube? The stern bearings are fitted within hollow steel cylinders within the stern tube, called bosses. Therefore, the shaft is housed within the bearings, which are housed within bosses, which again, are housed within the stern tube, as shown in Figure 2. So the aft boss houses the aft bearing and the forward boss houses the forward bearing. In order to be able to match the centreline of the bearing with the bosses with that of the bearings, the bosses are ordered with a machining allowance for their internal diameter (just for the same reason why the bearings have machining allowance in their internal diameter.)
5. The stern frame is welded to the hull structure and the stern bosses are welded to the stern tube.
6. Now arises a problem. Because of multiple welds on the hull structure and also because of the cutting allowances considered for each steel plate on the hull, the geometric centreline of the aft and forward bosses will not match the required centreline as specified in the design drawing.
7. A telescope is placed at the required height which matches the height of the design centreline. Multiple targets are placed at the aft and forward ends of the aft boss, forward and aft end of the forward boss, and along the centreline of the engine output flange.
8. The arrangement is then viewed through the telescope, and the position of the targets are aligned accordingly unless and until all the centrelines of all the targets appear to be in one line through the telescope.
9. The centres of the forward and aft boss are then marked. These centres should now match the centrelines of the forward and aft bush bearings respectively. So according to the obtained centres of the bosses, the internal diameter of the bush bearings are machined to the required internal diameter so as to be able to house the propulsion shaft. (This is why, the shipyard always orders the bearings with a machining allowance on the internal diameter.)
10. Care is taken regarding the achievement of correct internal diameter of the bush bearings (If the internal diameter is too large, the shaft will wobble within it, and the centrelines will not match. If the internal diameter is too less, it will not be able to house the shaft within the bearing) This is why, the internal diameter is measured precisely by a micro-meter after machining the internal diameter.
11. As a matter of fact, the forward and aft bush bearings are ordered with 5 mm machining allowance on their outside diameters. The outer diameter of these bearings are machined so that there will be an interference of about 0.01 to 0.02 mm between the internal diameter of the bosses and external diameter of the bearings.
12. This allows the bearings, to be pressed into the bosses of the stern tube, with an interference fit. Figure 3 shows the arrangement after the bearings are fitted within the bosses.
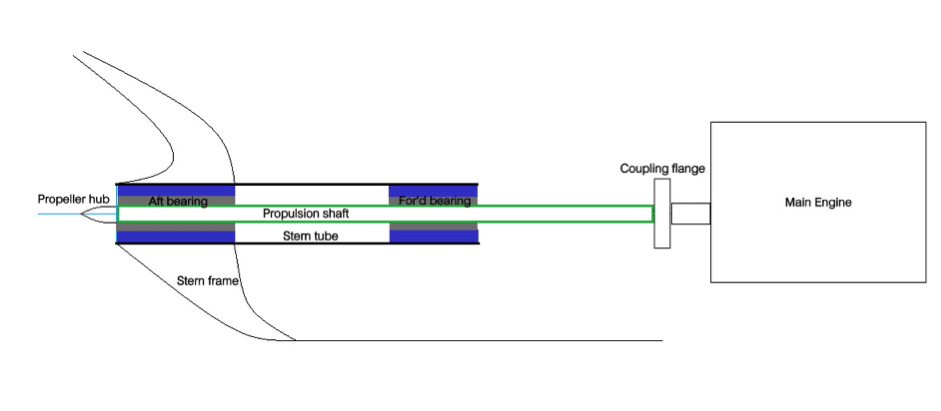
13. Once the centreline is achieved, the propulsion shaft is fed into the bearings, for installation.
Advanced technologies of boring and sighting also use laser technologies to ensure better precision than the above explained method. Boring and sighting is also used to line up the centreline of the rudder spindle with the steering gear equipment.
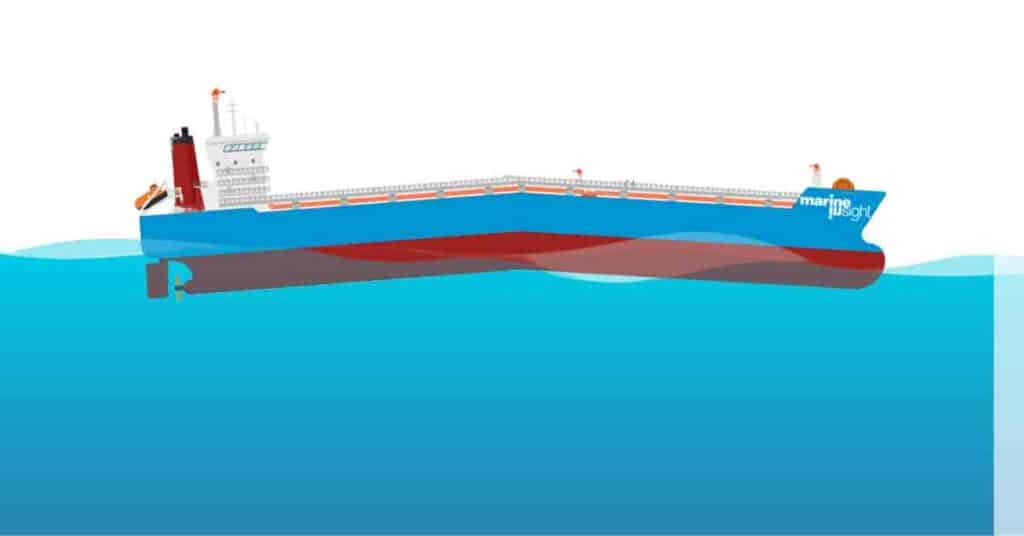
However, even though the shafting system is aligned such precisely during the building process in the shipyard, the shaft may still deflect from its original alignment due to the bending of the hull girder. Different bending scenarios occur, depending upon the loading conditions and the sea states the ship is sailing in. Therefore, the change in shaft alignment may occur due to bending of the propeller shaft, during this process.
Therefore, it is important for designers, to consider the effect of hogging and sagging of the hull girder on the change in alignment of the shafting system. To give a slight peek in the designing process of this aspect, let us understand that the underlying principle is yet very simple, and follows the Euler’s beam bending theory. In the design of the shaft for a ship, designers estimate the torsional, bending and shearing loads on the shaft, and thereby, the critical points of bending are found out. Accordingly, the position of the bush bearings (aft bearing and forward bearing) are decided so as to ensure that the deflection in the shaft is as low as possible in the worst loading conditions.
Classification societies, being related with the development of structural safety rules for ships on a proactive basis, have been involved in developing rules considering this effect. They have also researched various types of ship for this aspect, and documented the obtained statistics for future reference by ship designers, builders and dry dock personnel.
It is also very important and necessary to carry out regular checks for bearing clearances between the bush bearings and the propulsion shaft. Due to prolonged use in various loading conditions, the inner linings of the bearings tend to wear out, thereby increasing the clearances between the shaft and bearing metal. This may also lead to wobbling of the shaft.
During tests for checking the shaft alignment and deflection, the observations should be noted at lightship condition (in which case the shaft deflection will be minimum, and will exhibit the inherent deflection in the shaft), and in the fully loaded draft condition (wherein, the deflection will be maximum owing to the additional deflection due to the bending of the hull girder itself).
Do you have info to share with us ? Suggest a correction
Latest Naval Arch Articles You Would Like:
Subscribe To Our Newsletters
By subscribing, you agree to our Privacy Policy and may receive occasional deal communications; you can unsubscribe anytime.
Web Stories










Sir,
can you please make an animation regarding about this please. would appreciate it. ! thanks!
This is a good rundown of some shipyard processes but there are even more advanced methods than dicussed. Most large ships are aligned using strain gauges and only use optical or lasers for very rough alignments. Find out.more at http://www.lamalotech.com
I want to join merchant navy
Hi plese send for me proseuder of main shaft alignment with laser in big ship
best regard for you
Hi, thanks for the nice article. I have a small doubt. While aligning the shafts, what is the permissible gap and sag at the couplings? Or after the shafts are coupled, what is the permissible slope of the shaft at the coupling?