

A Comprehensive Guide to Marine Sextant – Principles, Usage, and Maintenance
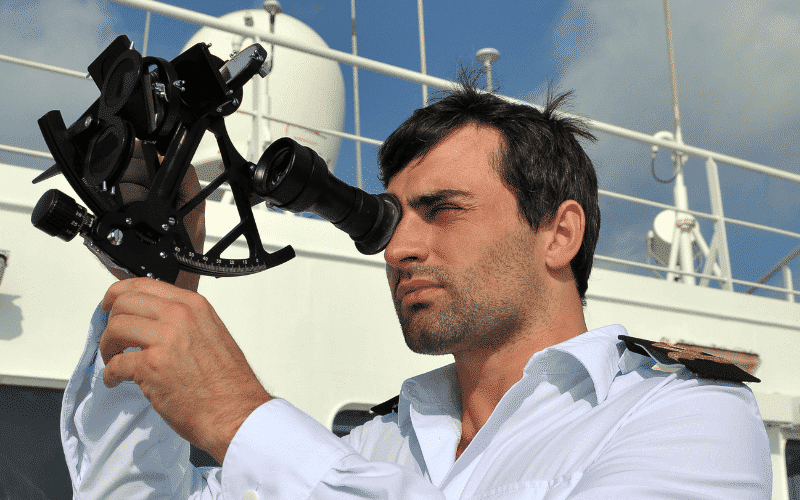
The sextant is a valuable instrument used to determine the angle between the horizon and a celestial body like the Sun, Moon or Star. It is used in celestial navigation to find out the latitude and longitude.
Sextant derives its name from the Latin word’ sextus; or ‘one-sixth’, as the sextant’s arc spans 60° or one-sixth of a circle. Octans with 45° arcs were initially used to determine the latitude. However, Sextants were developed with wider arcs to calculate longitude from lunar observations. They replaced octants by the latter half of the 18th century.
It consists of an arc of a circle marked in degrees. It also has a movable radial arm pivoted at the circle’s centre. There is a telescope mounted to the framework, which is lined with the horizon.
A mirror is placed on the radial arm. It is moved or adjusted until the celestial body is reflected into a half-silvered mirror in line with the telescope and appears to coincide with the horizon through the telescope.
The angular distance of the celestial body or star above the horizon is read from the graduated arc of the sextant.
Mainly used at sea, the tool is so named because its arc is one-sixth of a circle – 60 degrees. It adheres to the principle of double reflection hence it can measure angles up to 120 degrees. Practically speaking, the arc of the sextant is a little over 60 degrees, and therefore the total angle measurable is about 130 degrees.
Sextant is an essential tool for celestial navigation and is also used by mariners to measure the angle between the horizon and a visible object (or two objects at sea).
Hold the sextant vertically and point it in the direction of the celestial body. See the horizon through an unsilvered part of the horizon mirror. Continue to move or adjust the index arm until the image of the star/sun, which has been reflected by the index mirror and then by the silvered portion of the horizon mirror, seems to rest on the horizon.
The altitude of the celestial body can be determined by reading from the scale on the arc of the sextant’s frame.
The sextant is used to measure the following:
- Vertical Sextant Angle (VSA)
- Horizontal Sextant Angle (HSA)
- Altitudes
Brief History Of Sextant
A ship’s altitude above the horizon was related directly to the ship’s latitude. Mariners began to invent tools for measuring these factors to aid in navigation. One of the simplest was the kamal used by Arab navigators from the 6th century onwards.
A 2-inch long rectangle board was used. A string with evenly spaced knots was attached to it. This arrangement was called a kamal. The navigator held the string using his teeth and moved this board farther from his body, aligning its bottom edge with the horizon and the top with the object, generally the Polaris or the north star.
The number of knots between the mouth and the board gave an idea of the relative height. Although kamal was quite useful, it was not precise enough and, by the 13th century, gave way to the astrolabe and the mariner’s Quadrant.
The Quadrant was popular with Portuguese explorers that travelled south along the African coast to search for a route to the Orient.
When the seafarers reached close to the equator heading south, Polaris disappeared below the horizon. Hence, in the southern seas, mariners used another way to find their latitude. Per instructions from Prince Henry of Portugal, by 1480, Portuguese astronomers had found a way to determine the latitude using the position of the Sun when it moved north and south of the equator with changing seasons, what we now refer to as its declination.
To put it simply, the navigator could calculate the Altura or altitude and latitude by using his Quadrant to take the altitude of the Sun when it came to its highest altitude at local noon and then make a correction for the position of the sun north or south of the equator per the date.
Columbus used it extensively on his voyages to the New World. He marked off the latitudes of places he visited, such as Lisbon, Serra Leoa, Cabo Verde and other places he might have landed.
Also, it was common for navigators during those times to record the altitude of the Polaris in degrees at ports where they wished to return again. Hence, lists of alturas of many ports were published to guide the seafarers up and down the coasts of Africa and Europe.
Principle of the Sextant
- When a ray of light is reflected by a plane mirror, the angle of the incident ray is equal to the angle of the reflected ray; when the incident ray, reflected ray and the normal lie on the same plane
- When a ray of light suffers two successive reflections in the same plane by two plane mirrors, the angle between the incident ray and the reflected ray is twice the angle between the mirrors
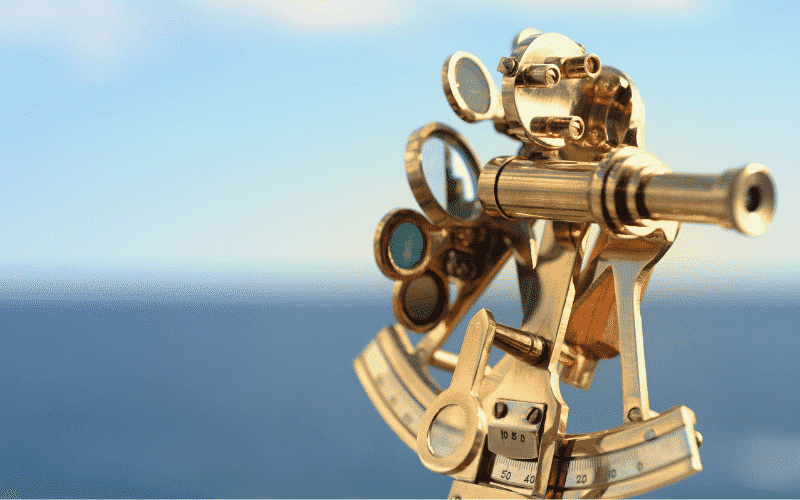
Different Parts Of A Sextant
A sextant is shaped in the form of a sector (60 degrees or 1/6th of a circle). It is the reason the navigational instrument is called a Sextant (the Latin word for 1/6th is Sextans). The sector-shaped part is called the frame.
A horizontal mirror is attached to the frame, along with the index mirror, shade glasses (sunshades), telescope, graduated scale and a micrometre drum gauge.
How Does A Sextant Work And How To Use It?
Watch this video to understand how to use a sextant.
Navigation Sextant – Readings ON and OFF the arc
The normal graduations of the arc, to the left of zero, extending from 0 to 130 degrees, are referred to as ON the arc. To the right of 0 degrees, the graduations extend for a few degrees and are referred to as OFF the arc. When reading OFF the arc, graduations of the micrometer should be read in the reverse direction (59 as 1′, 55 as 1′ and so on).
Errors of the Sextant
The errors can be classified as
1. Adjustable Errors (adjustable onboard), and
2. Non-adjustable Errors (not adjustable onboard)
Adjustable Sextant Errors
- The Perpendicularity error : This is caused when the index glass is not perpendicular to the plane of the instrument. To check for this, clamp the index bar about the middle of the arc, and holding the sextant horizontally, with the arc away from you, look obliquely into the index mirror till the arc of the sextant and its reflection on the index mirror is simultaneous. If in alignment, the error does not exist. If not, turn the adjustment screw at the back of the index glass until they are aligned.
- Side Error: This is caused by the horizon glass not being perpendicular to the plane of the instrument. Clamp the index bar at 0 degrees 0.0′. Hold the sextant vertically and look at the heavenly body. Turn the micrometre one way and then the other while looking at the body. The reflected image of the body will move above and below the direct image and should pass exactly over it. If the reflected image passes to the left or right of the direct image, a side error exists. This error can be removed by turning the second adjustment screw (the top screw behind the horizon glass) until the true and reflected horizons appear in the same line.
- Index Error: This is caused if the index mirror and the horizon glass are not exactly parallel to each other when the index is set at 0 degrees 0.0′. Basically, this is the difference between the optical zero of the sextant and its graduated zero, termed OFF the arc if the optical zero lies to the right of the graduated zero and termed ON the arc if the optical zero lies to the left of the graduated zero. There are three methods of obtaining the index error of a sextant:
A) By observing the horizon: Clamp the index at 0 deg 0.0′ and, holding the sextant vertical, look at the horizon. The reflected image and the direct image should appear in a perfect line. If not, turn the micrometer until they coincide exactly. The reading of the micrometre, ON or OFF the arc, gives the IE
B) By observing the star or planet: Clamp the index at 0 deg 0.0′ and holding the sextant vertical, look at the star/planet. The reflected and direct image must coincide. If not, turn the micrometer till they do. The reading of the micrometre, ON or OFF the arc, gives the IE
C) By observing the Sun: Set the index at about 32′ ON the arc. Hold the sextant vertically and look at the Sun, using shades. The reflected image of the Sun would appear below the direct image. Turn the micrometer until their closer limbs just touch. Note reading ON the arc.
Set the index at about 32′ OFF the arc and look at the Sun. The reflected image of the Sun would appear above the direct image. Turn the micrometer until their closer limbs just touch. Note reading OFF the arc.
The name of IE is the name of the reading having a higher numerical value.
- The error of Collimation: This is due to the axis of the telescope not being parallel to the plane of the instrument. The telescope is attached to the sextant in such a manner that it cannot tilt. These modern sextants are, therefore, not provided with any collimating screws
Non-Adjustable Errors Of Sextant
- Graduation Error: Due to the inaccurate graduation of the main scale on the arc or of the micrometre/vernier
- Centring Error: Caused if the pivot of the index bar is not situated at the geometric centre of the arc. This can be caused due to a manufacturing defect or due to careless handling.
- Shade Error: The shades should be so mounted that their glass surfaces are normal to the rays of light passing through them. If not, the distortion would result. The greater number of shades used, the greater the chances of distortion.
- Optical Errors: Caused by prismatic errors of the mirrors or aberrations in the telescope lens
- Wear on the rack and worm: This causes a backlash, leading to inconsistent errors. Wearing down of the worm can be due to lack of lubrication, the presence of dust particles, careless handling.
Dip
This is the angle at the observer between the plane of the observer’s sensible horizon and the direction of his visible horizon. A dip occurs because the observer is not at sea level. The value of the dip increases as the height of the eye of the observer increases. The values of dip are given on the cover page of the nautical almanac and in nautical tables (Nories) as a function of the height of the eye.
Pointers on the use of a sextant
- Always check the errors before use
- Focus the telescope while looking at the horizon and make a mark on the circumference of the stem
- During use, hold the sextant steady. For this, stand with feet slightly apart for balance with hands holding the sextant steady
- While observing the altitude of a celestial body, remember to swing the sextant to the other side; the body will appear to move along the arc. Measure the altitude at the lowest point on this arc
- Stand as close as practicable to the centerline of the ship
- Use appropriate dark shades while observing the Sun
- If a backlash error exists, remember to rotate the micrometer in one direction only
- Altitudes of stars and planets should be taken during twilight
- Nighttime sextant observations should be avoided as far as practicable. The strong moonlight gives the illusion of a good horizon which is most probably false
- While observing the HSA, set the index at zero, look at the object on the right through the telescope, gradually swing the index around and finish while facing the object on the left
- When measuring VSA, look at the top of the object, set the index at zero and look at the top of the object. VSA = height of the object in meters
1852 X Tan VSA
Care and maintenance of a sextant
- Do not put too much stress on the index bar when grasping a sextant
- Never touch the arc. It will smear it. These aren’t oleophobic per se
- Ensure that the worm and rack are clean
- Coat worm and rack with Vaseline when not using it for too long
- Mirrors, lenses and shades should be wiped clean with a soft cloth
- After each use, gently wipe the index mirror, horizon glass
- Put it in the box when not using it
- Do not bump the sextant anywhere
- Avoid exposure to sunlight
- Keep sextant stowed away from direct sunlight, dampness, heaters or blowers
The sextant is an expensive, precision instrument which should be handled with utmost care.
Reference: Principles of Navigation by Capt. Joseph & Capt. Rewari, The Marine Sextant by Capt. H. Subramaniam
You may also like to read – An Introduction to Fluxgate Compass
Disclaimer: The authors’ views expressed in this article do not necessarily reflect the views of Marine Insight. Data and charts, if used, in the article have been sourced from available information and have not been authenticated by any statutory authority. The author and Marine Insight do not claim it to be accurate nor accept any responsibility for the same. The views constitute only the opinions and do not constitute any guidelines or recommendations on any course of action to be followed by the reader.
The article or images cannot be reproduced, copied, shared or used in any form without the permission of the author and Marine Insight.
Do you have info to share with us ? Suggest a correction

About Author
Shilavadra Bhattacharjee is a shipbroker with a background in commercial operations after having sailed onboard as a Third Officer. His interests primarily lie in the energy sector, books and travelling.
Latest Marine Navigation Articles You Would Like:


Subscribe To Our Newsletters
By subscribing, you agree to our Privacy Policy and may receive occasional deal communications; you can unsubscribe anytime.
Web Stories


HAHAHAHAH IT SAYS SEX
It’s always interesting to find unexpected humor in everyday things (it is for seafarers).
How to find which planet is available for taking sight on particular month